
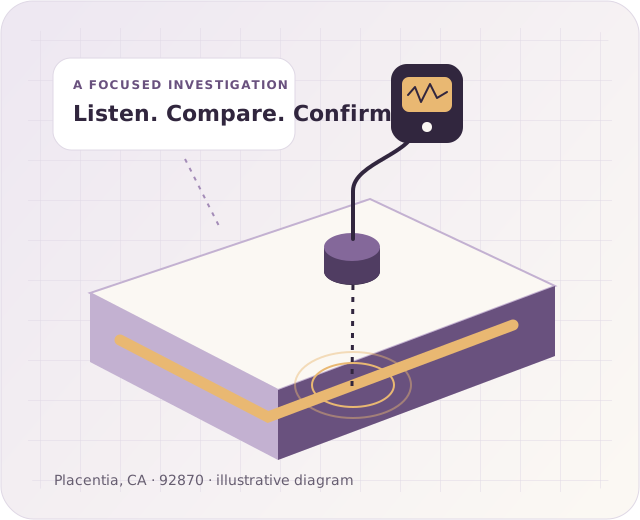
What does slab leak detection confirm?
A useful inspection turns an unexplained symptom into a documented finding about the plumbing.
Slab leak detection in Placentia, CA is the investigation of a suspected leak in piping beneath a concrete floor. The aim is to establish whether water is escaping, identify the affected system, and narrow the location enough to plan the next step. Detection is a diagnostic service. Fixing the pipe, drying wet materials, and restoring a room are separate scopes.
The visible damage may be several feet from the source. Water can move along a pipe trench, through a wall cavity, or beneath flooring before it appears. An inspection should follow the evidence back toward its source rather than treat the edge of a stain as the place to cut.
We explain the decisions behind testing so you can ask for findings you understand. A useful result identifies the tests performed, the area investigated, and the limits of the conclusion. For the broader repair choices after diagnosis, see our Placentia slab leak repair guide.
Which detection methods fit the situation?
The equipment should answer a specific question. More tools do not automatically mean a more certain result.
Is the loss on a particular supply line?
A technician may isolate accessible branches, which means separating them from the rest of the water system. Controlled pressure testing can then assess whether the tested section holds pressure. The test setup, valve condition, and connected equipment matter. A pressure drop needs interpretation; it does not mark an exact hole beneath the floor.
Where is the sound strongest?
Acoustic listening uses sensitive equipment to compare sound at suitable points. Escaping water can produce a signal that helps narrow the search. Pipe construction, depth, floor coverings, and nearby machinery can affect what is heard. LeakTronics describes ground-listening equipment designed for this work. No particular brand is required for every investigation.
What do heat and moisture patterns add?
Thermal imaging maps differences in surface temperature. A hot-water leak may produce a useful pattern, but sunlight and other heat sources can also change a reading. Moisture meters help compare areas and check whether a material is wet. As FLIR explains, a thermal image alone does not establish the presence of moisture. Corroborating measurements matter.
Could the source be a drain?
Supply testing and drain testing answer different questions. A drain camera may reveal a visible defect where a suitable access point exists. Additional testing may be needed to show whether that defect leaks. If symptoms follow fixture discharge, discuss under-slab drain leak repair rather than assuming a supply-line investigation covers the wastewater system.
Which eight signs are worth reporting?
A combination of observations helps plan testing. None of these signs, by itself, proves a buried pipe has failed.
A change on the water bill
Compare the actual usage and billing dates, then note irrigation changes or extra occupants. A higher charge alone does not identify a plumbing fault.
Meter movement during a quiet period
Flow while household use is off can justify investigation. Automatic equipment and shared meters must be accounted for before treating movement as unexplained.
A repeated warm area
Record the location and time it feels warm. A pattern that persists without recent hot-water use deserves attention, but temperature cannot confirm the source.
A water sound with no fixture running
Describe where the sound is clearest and whether it changes. Pumps, appliances, and neighboring plumbing can complicate listening, especially in attached homes.
New dampness at a floor edge
Photograph the first visible boundary and any spread. Water from a wall or appliance can reach the same area as water from below.
Flooring that changes shape
Lifting, swelling, or loose finishes can accompany moisture. An inspection should investigate the cause before replacement flooring covers the affected surface.
A lasting change in pressure
Note whether every fixture is affected or only one outlet. A clogged fitting or valve problem can also reduce flow, so this clue needs context.
A symptom that follows drain use
Dampness or odor appearing after a shower or laundry cycle may shift the investigation toward wastewater piping. Avoid touching suspect contaminated water.
Why might a hidden leak develop?
A confirmed leak and an explanation for its cause are different findings.
A buried supply pipe can fail at a connection or along the pipe wall. A small perforation, a damaged section, or a previous repair can each create a different pattern. Testing may identify the affected branch before the damaged material can be examined. Ask whether the stated cause was actually observed or remains a working explanation.
The home's plumbing history can be more useful than a construction date alone. An original branch may sit beside a later replacement, and an addition may have changed how fixtures are fed. Gather any drawings, invoices, or notes from earlier work. Tell the technician about repairs that changed the symptom, even if they were in another room.
Moisture can also come from above the slab. A leaking dishwasher connection, shower assembly, wall pipe, or exterior water source can mislead a floor-level inspection. A careful investigation keeps those alternatives open until testing supports a narrower conclusion. A community name does not establish the pipe material, foundation type, or reason for failure.
What can you safely check first?
Simple observations can make an inspection more focused. Leave pressure testing, dismantling, and floor openings to the appropriate professional.
Look at accessible fixtures from a dry position. Check whether a toilet keeps refilling, a faucet drips, or a visible appliance connection is wet. Note the result without removing panels or moving heavy equipment. A fixture leak may explain the water use even when the floor symptom needs a separate investigation.
For a safely accessible meter that serves only your home, record a reading before a period with no water use. Account for irrigation, ice makers, and other automatic uses. The EPA suggests comparing readings over two hours. A change points to water passing through the meter; it does not tell you where that water went.
Do not operate a utility valve, open a shared system, or force a stuck handle to improve the test. In a condominium, ask management how the meter and shutoff arrangement works. Keep a log of symptoms and water use instead of experimenting with unfamiliar controls.
What should happen during the inspection?
Agree on the diagnostic scope and access arrangements before testing begins.
- Review the symptom history. Show the first affected area, changes since then, and known earlier repairs. Identify which fixtures were used when symptoms appeared.
- Confirm the system layout. Establish the relevant meter, household shutoff, and accessible plumbing points. Check whether another unit or a common line may be involved.
- Rule out accessible alternatives. Visible fixtures, appliances, and outdoor uses may explain all or part of the evidence. Keep separate symptoms separate until a connection is supported.
- Select and explain the tests. Ask which branch is being tested and why. Listening, temperature comparisons, and pressure tests should build a coherent finding rather than a pile of unexplained readings.
- Mark the investigation result. Request a photo or sketch showing the suspected source and any uncertainty around it. A floor mark should have an explanation attached.
- Discuss the next authorization. Clarify whether more investigation, controlled access, or a repair proposal comes next. Agree on any additional charge before that scope begins.
If a limited opening is proposed, ask what it will establish and who restores it. Detection can reduce guesswork, but it cannot promise that every pipe will be located without access. A sensible stopping point is one where you know what is confirmed and what decision remains yours.
What affects the cost of slab leak detection?
Ask for the diagnostic charge and its boundaries before comparing estimates.
| Number of systems | Testing one supply branch differs from checking hot water, cold water, irrigation, and drains. |
|---|---|
| Available test points | Accessible valves and clear pipe routes may simplify isolation. Concealed or uncertain layouts can require more work. |
| Signal conditions | Pipe depth, floor finishes, background sound, and the leak's behavior can affect listening and interpretation. |
| Building coordination | Shared lines, entry arrangements, and access to another unit can change how testing is scheduled. |
| Deliverables and return visits | Confirm the written findings, any marking, further testing, and whether repair work is quoted separately. |
In Placentia, ask Building and Safety about requirements if the next step changes from observation to covered plumbing work. Do not assume the diagnosis authorizes a repair, or that an inspection quote includes permit work, cutting, patching, or drying.
When should you treat the situation as urgent?
The amount of water spreading matters more than whether the leak has been given a precise name.
Seek prompt help when water keeps entering occupied rooms, a known supply leak cannot be controlled, or moisture reaches electrical equipment. Do not wait for a two-hour meter comparison while visible damage is increasing. Limit access to the affected area and describe the active conditions when arranging assistance.
Use a familiar household shutoff only when it is safely reachable and you are authorized to operate it. If reaching it means crossing water near electricity, stay out. A shared building may need management to arrange the shutoff. Contaminated water and immediate electrical danger require a different response from a routine diagnostic appointment.
What changes testing in an attached Placentia home?
Entry, meter arrangements, and permission can affect the visit before any instrument is used.
In Woodfield, attached townhome layouts make it useful to describe garage access and the position of shared walls. That information helps prepare the inspection; it does not establish that the association owns the failed pipe. Obtain an answer about responsibility from the relevant property records.
For a home in Cinnamon Tree, identify whether the symptom is upstairs or at ground level and arrange any required entry. Water in an upstairs unit calls for a broader source check before anyone labels it a slab problem. Do not shut off another unit's water to test a theory.
Once the leaking line is confirmed, a localized defect with suitable surrounding pipe may lead to a targeted slab leak spot repair. Ask how confident the location is and what access will involve. The diagnosis should support that decision without locking you into a repair before its scope is explained.
What else should you ask about detection?
These answers help define the service before you authorize a visit.
Can the meter identify the exact slab leak location?
No. The meter indicates water moving through its measured supply. It cannot identify a room, branch, or depth. Toilets, irrigation, and automatic equipment can also cause movement. The inspection must separate those uses and add location evidence before a floor opening is justified.
Can detection miss an intermittent leak?
A leak that stops during the visit may be harder to confirm. Give the technician a time log and explain any connection with fixture use. Ask what the tests established under the conditions present and whether a monitored follow-up or different test is appropriate.
Will a thermal camera find a cold-water leak?
Sometimes a temperature pattern helps, but the answer depends on conditions. Cold water may not create a clear contrast with the surrounding surface. An unclear thermal image does not clear the plumbing. Line testing and moisture comparisons may still be needed to investigate the symptom.
Does the diagnostic visit include repairing the pipe?
Only if the agreed scope says so. Diagnosis, controlled access, pipe replacement, and finish work can be separate authorizations. Ask for the inspection deliverable and the charge first. If repair is proposed during the visit, request its method, boundaries, and price before approving it.
Should furniture and floor coverings be removed first?
Clear ordinary movable items only where doing so is safe. Ask in advance which rooms and accessible plumbing points need space. Do not lift installed flooring, remove cabinets, or move heavy appliances on speculation. Those steps should follow a clear plan and appropriate authorization.
What if the investigation does not confirm a slab leak?
Request the negative findings as well as the remaining questions. Knowing which tested lines held pressure or which visible source explains the water can prevent an unnecessary opening. Ask what other source should be assessed and whether additional plumbing testing is warranted before choosing repairs.
Where can you explore detection planning in Placentia?
Choose your community for location-specific access and preparation guidance. Confirm the actual service address when arranging an inspection.
- Slab leak detection in Woodfield
- Slab leak detection in Cinnamon Tree
- Slab leak detection in Granada Park
- Slab leak detection in Placentia Village Groves
- Slab leak detection in Placentia Lakes
- Slab leak detection in Corte Vista Villas
- Slab leak detection in Northpoint at Alta Vista
- Slab leak detection in Old Town Placentia
- Slab leak detection in Atwood
- Slab leak detection in La Jolla
- Slab leak detection in Altura
- Slab leak detection in Bella Vista on the Green
- Slab leak detection in Alta Vista South
- Slab leak detection in Hamptons on the Green
- Slab leak detection in Mariposa Lane